Restorative Yoga Meaning, Benefits and Poses
Restorative yoga helps us in relaxing and resting completely and deeply for the benefit of the organ system of our bodies. It is a form of yoga which seeks to achieve mental, emotional and physical relaxation with the help of props. The props usage makes it simpler for us to maintain the balance while we stimulate and relax our bodies. While some of the poses of restorative yoga are beneficial to the entire body, the other yoga poses target some specific parts of the body, such as lungs or heart.
Typically the sequence of restorative yoga involves only five or six postures which are supported by props that allow you to relax and rest completely. In each restorative poses you have to hold yourself in a specific position for five minutes or more. The poses include seated forward folds, gentle back bends and light twists. The modern restorative yoga poses are generally based on the teaching process of B. K. S. Iyengar, who is known as one of the greatest yoga masters in the world. In restorative yoga use of props are mandatory to provide complete comfort and relaxation of the body and mind.There is a four week programme for the students of restorative yoga to have the insight of the eight essential poses which helps in eliciting the relaxation response.The time duration is also needed to set up simple props for encouraging deep mind and body release. During this time body undergoes healing through different yoga sequences and the meditative and breathing exercises. Students are offered lectures on the alignment of body and the methods to cure mental and physical injuries.
Student along with seasoned practitioner benefits from the little tweaks. Thesetweaks could always get you more relaxation during your practice. It can provide you deeper breathing and longer holds in your postures.
Classic Restorative Yoga Poses for Home Practice
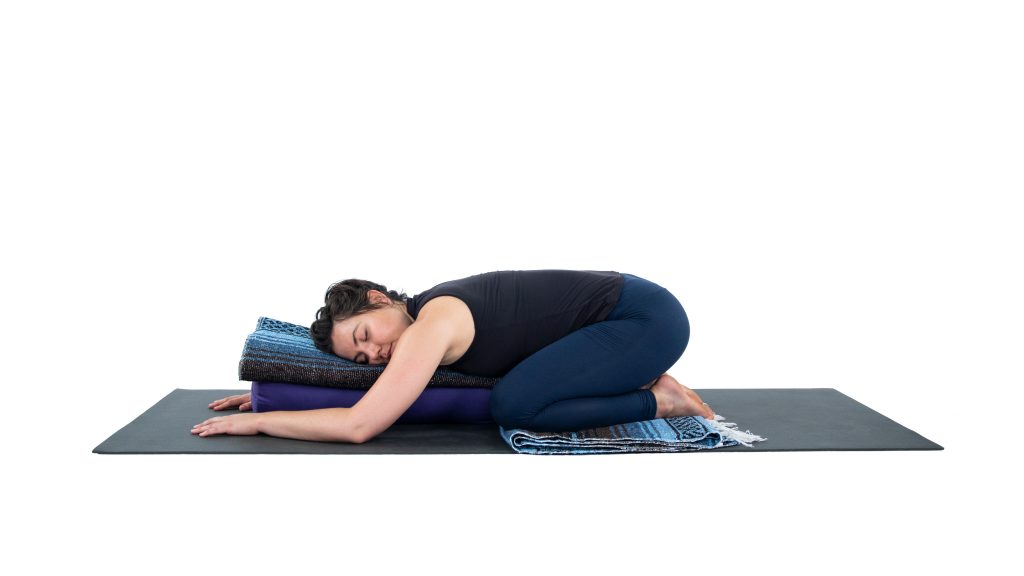
Restorative Child Pose: You should place a bolster on your mat long ways or you can put three to four neatly folded blankets and stack them in the shape of a bolster. Next, you must place your legs at the edge of the bolster on the mat. You should now bend forward and drape your torso to rest over the blankets or the bolster. In this position put your arms in front of you gently on the floor. Your cheek should be resting on the bolster. To avoid any stiffness in the neck you should change the side of your cheek from time to time.
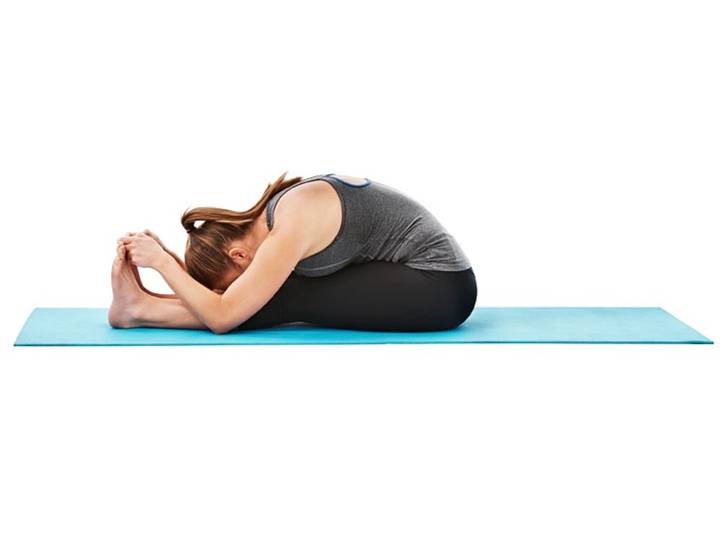
Restorative Paschimottanasana: To start with you should sit with your legs extended full forward and with your back straight up. Inhale deeply and then exhale while bending forward over your legs. Stop bending when your back needs to round and place the bolster or blankets on your legs till they are high enough for you to rest your torso over them. Your spine can bend at this point. Your head should also be resting over the blankets on one side. You must keep in mind to change the direction of your head frequently during the ten or more minutes of your stay in this pose.
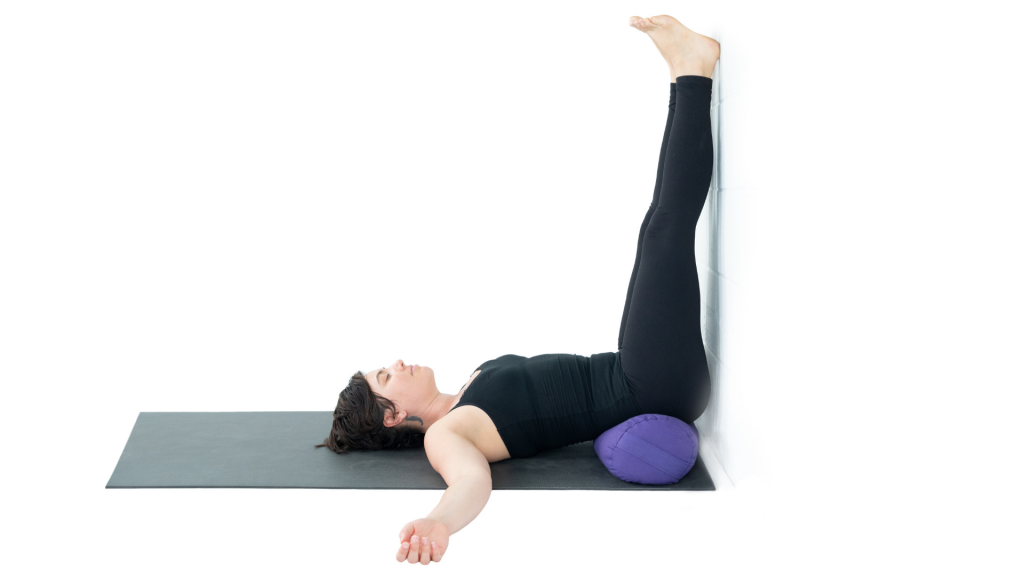
Restorative leg-up-the-wall: This pose is the most restorative position. Here the wall is the major prop and offers support to keep your legs vertical. Now you could use the bolster or two to three folded blankets keeping them close to the wall along its length. You should sit with your side touching the wall and at the end of the bolster. You should drop your hands back for support when you swing your legs up the wall. Get down to the elbows and finally to your back. Allow your arms to relax along your sides. Your butt should always stay on the bolster to give you the effects of mild inversion. Stay in this position for ten or more minutes and later bend your knees towards your chest.Finally, roll over to a side and come out of this posture.
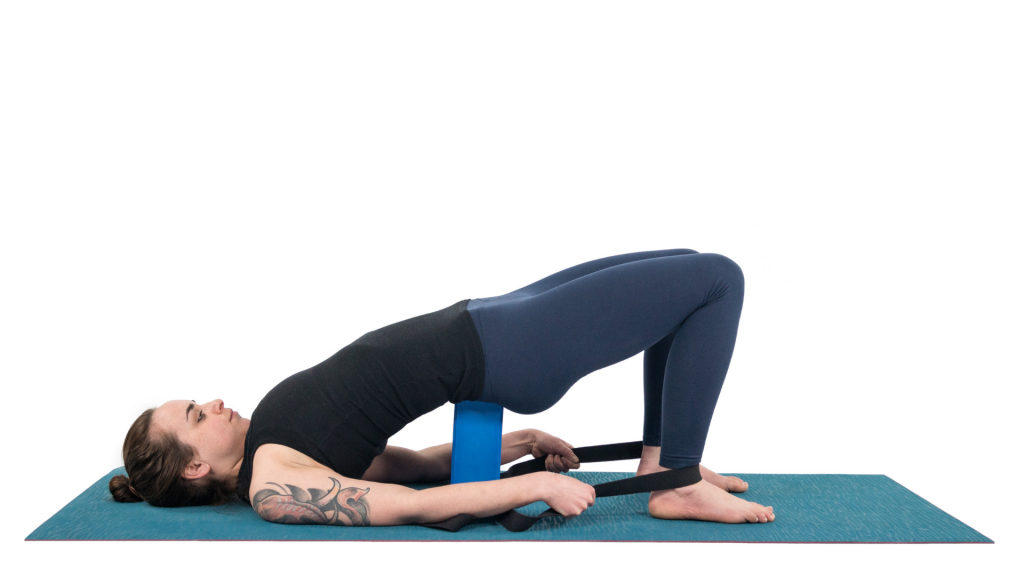
Restorative Bridge Pose: Active back bends need lots more work whereas passive back bends are relaxing posture. Letting your body open over a long period holding time is a wonderful experience. You are required to have only one block for a supported bridge. Prepare yourself for the bridge pose keeping the block within your reach. Lifting your hips place the block below your sacrum. Allow the weight of your lower body to rest on the block. In the beginning the block should be kept at its lowest height. When you are feeling comfortable after a few minutes, you can try in the higher position by turning the block such that its height increases. For a much longer holding time you must avoid the highest position of the block. After ten or more minutes you can push your feet onto the floor to lift your hips and remove the block.
Restorative Heart Opener: For this type of heart opener, a bolster or an ergonomic block is used. A bolster should be placed across the mat. You must now lower yourself on the mat such that your shoulder blades are placed over the bolster. Your head should be hanging over the bolster which you should later rest on the floor. Bringing your arms overhead could be pretty intensive. Your legs should be extended. You should relax in this position and allow your heart to melt open.

Restorative Savasana: In this position you can lie on your back with outstretched legs. It would be better if you can place a rolled blanket under your knees, another blanket under your head and a little support for your neck. You shall really feel wonderful in this position for twenty minutes or even more.